Home Energy Monitoring – Part 1: Babby’s first PCB

I’m a bit of a data nerd and have been gathering metrics from my local machines for sometime now. The ability to see trends is really powerful when diagnosing problems and tuning performance.

I’m using the TIG stack – Telegraf (data collection), InfluxDB (time series database), and Grafana (visuals and alerting).
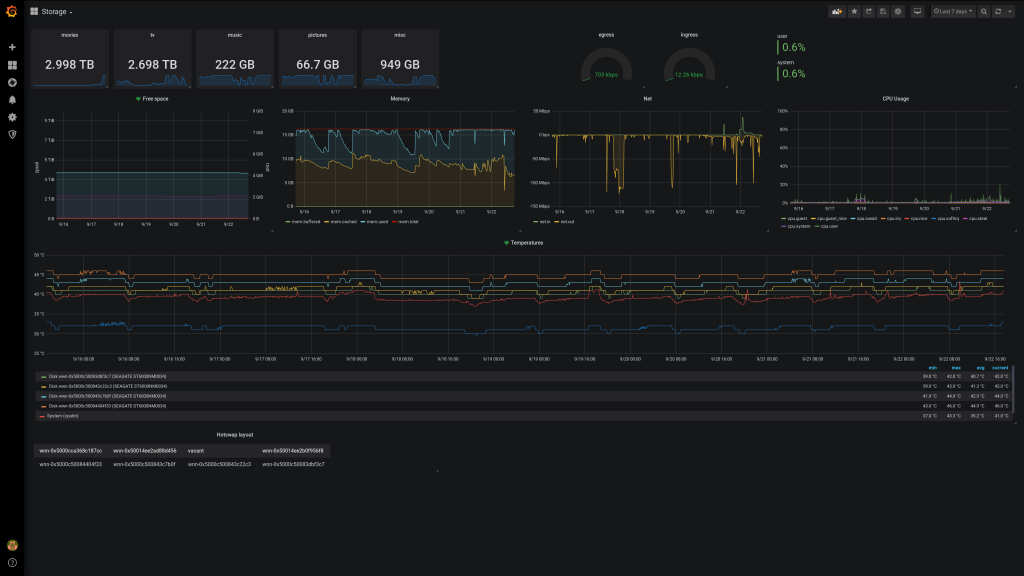
Grafana dashboard – file server

I wanted to utilize these same tools for monitoring energy usage in my house. I set out a goal to be able to see energy usage in near real time, per circuit, using mostly free software and hardware.

I ran across an excellent post on boredman’s blog that describes the hardware side of a system that very closely matches my goal. I immediately went out and acquired the pieces to play with this for myself. It wasn’t long before I had something working on my bench.
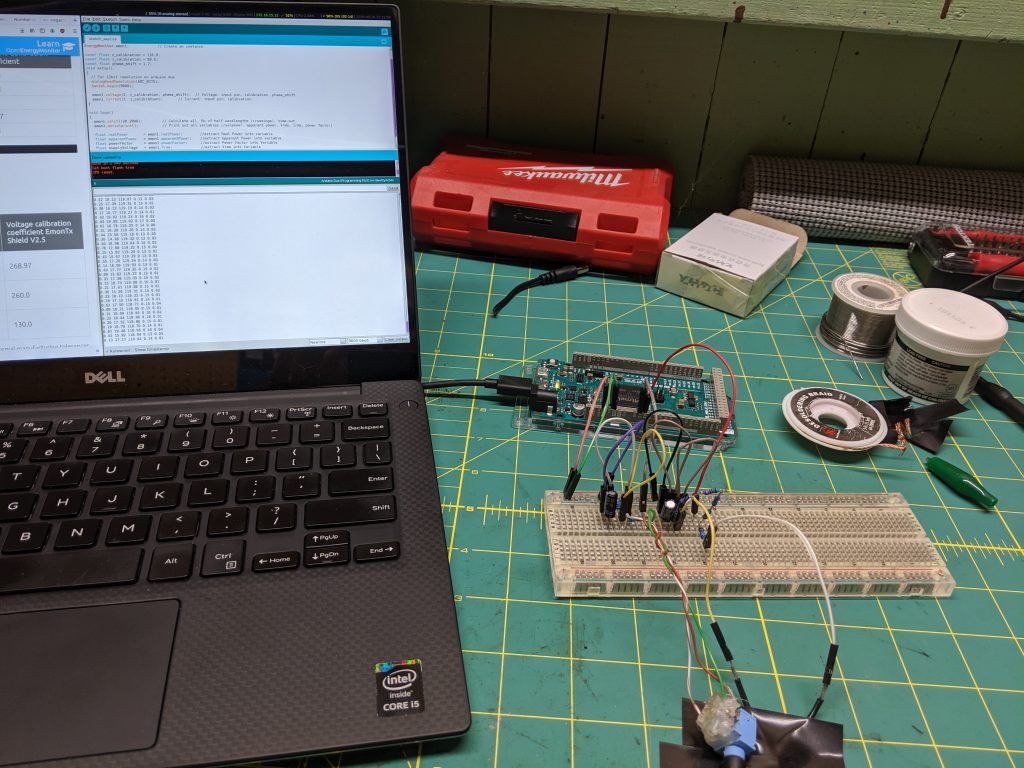
Current transformer and AC-AC voltage inputs into Arduino Due

With a working proof of concept it was time to think about next steps. For me this was form factor, scaling. The Arduino Due supports 12 analog inputs. One will be consumed for Voltage measurements using an AC-AC transformer and the others will be for current measurements from current transformers on each circuit in my house. I have 22 circuits in my electrical panel — I will need two Arduinos or find better way to add analog inputs.

Input board 1.0

Fritzing is software for creating PCBs for newbies. Perfect. I was able to cobble together a board with CT (current transformer) and voltage inputs to a pin header thinking I could run a ribbon cable from the input board to Arduino. It wasn’t too hard to get going in Fritzing but I found it difficult to get something that looked nice and wasn’t even sure it would work. This board only has a burden resistor for each CT input.

Read more about CT burden resistors and home energy monitoring at the excellent Open Energy Monitor project
https://learn.openenergymonitor.org/
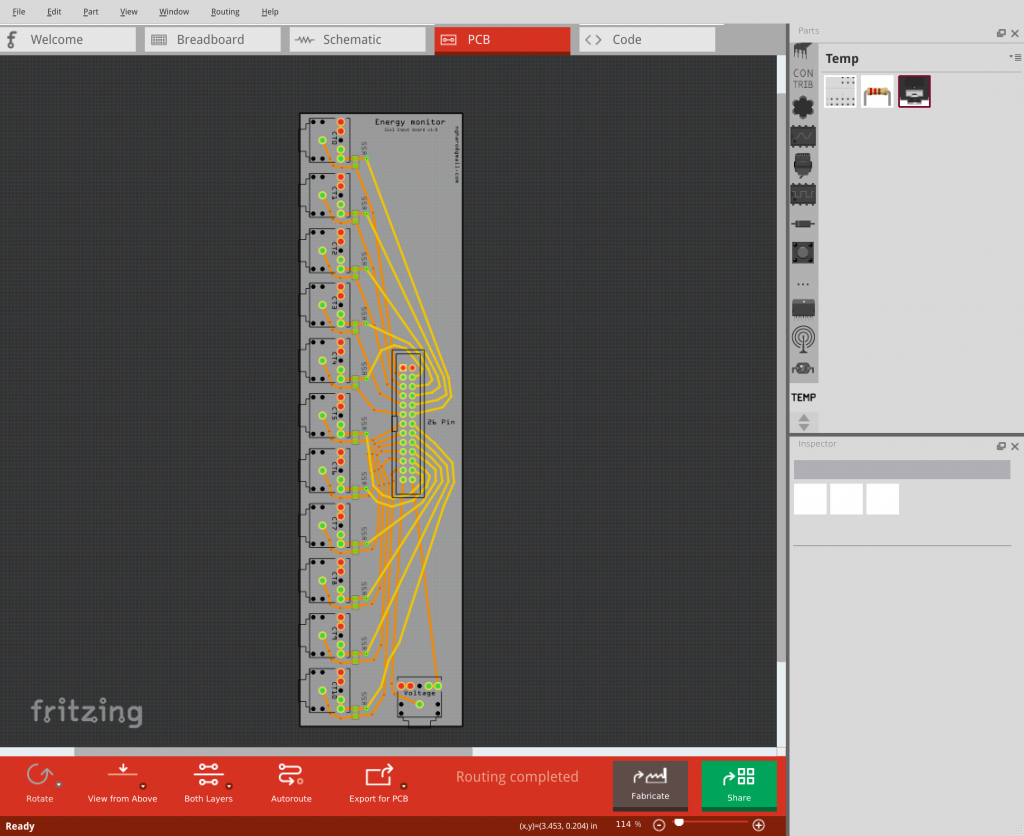
Fritzing – Input board 1.0

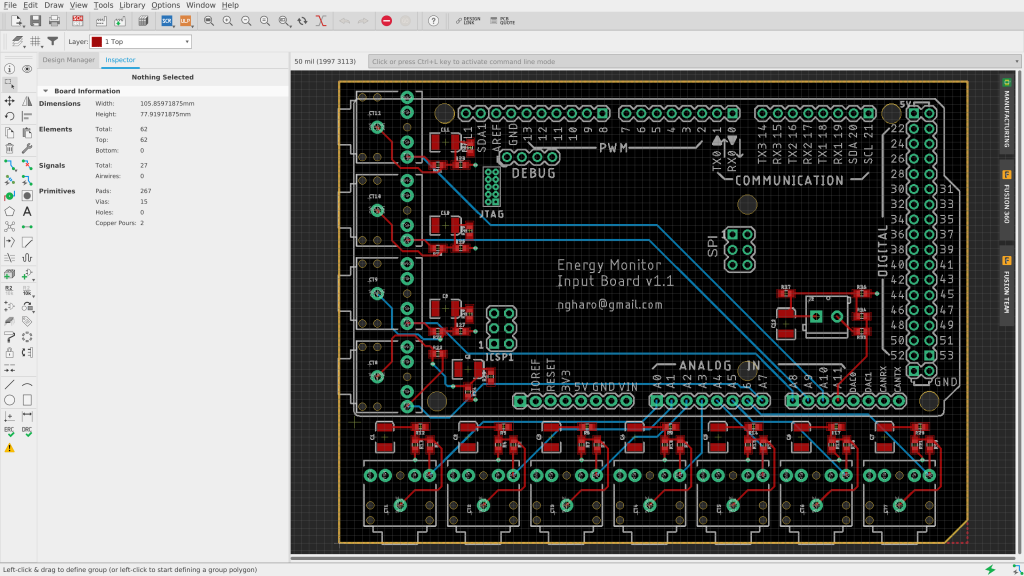
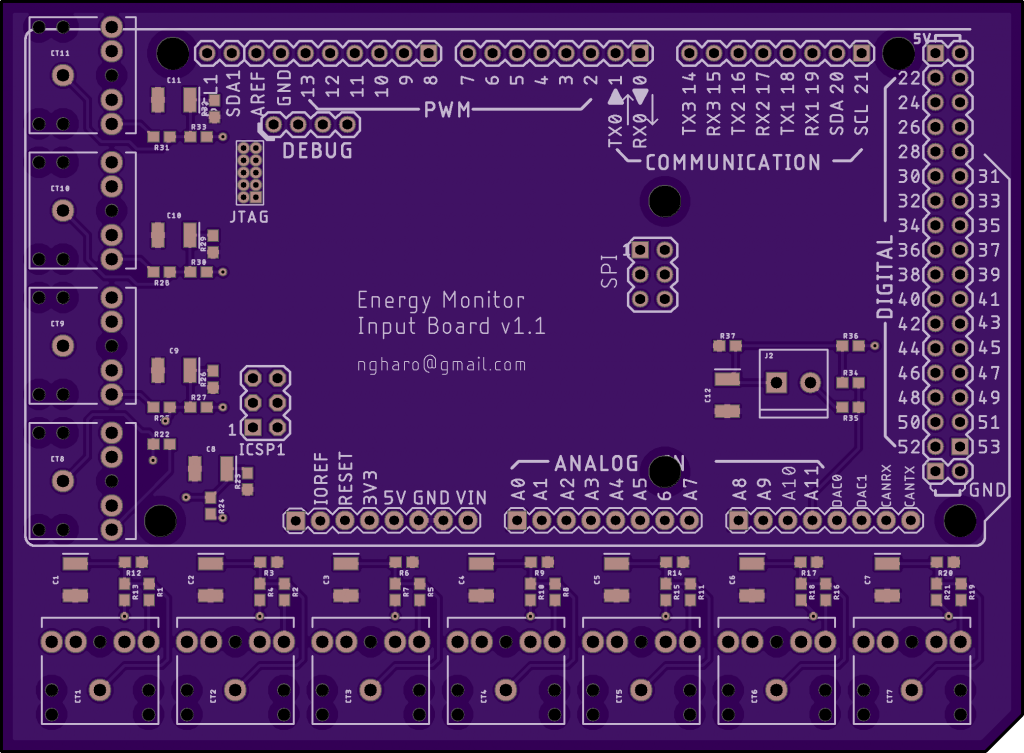
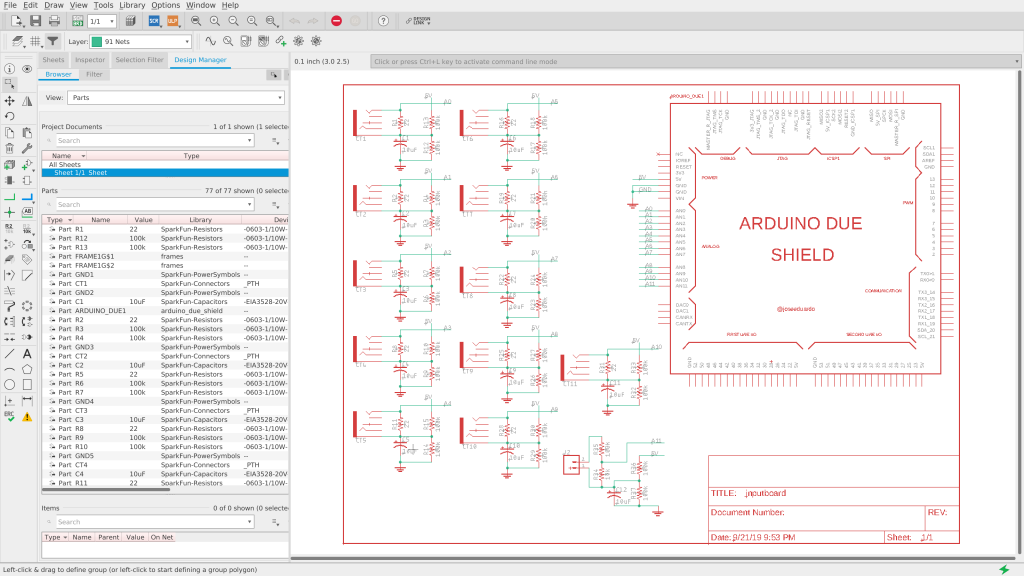
I was worried that I would be getting a lot of interference since I’m dealing with AC signals and overall felt I could do better. I iterated, this time using Eagle PCB design software. I extended to scope to capture the remaining components for each input and make it be able to plug directly into an Arduino Due.

There simple wasn’t enough room on the Arduino for 11 x 3.5mm TRS (audio jacks) inputs so I had to design the board with some margins to accommodate the inputs.

Version 1.1 was born

I followed this tutorial on Sparkfun for Eagle basics. You start by building your schematic in Eagle. You can pull in libraries of parts from places like Sparkfun which is really convenient. You then connect parts together using nets. Nets are like a virtual wire. Any wire/pin/whatever on Net1 will be connected.

After you’ve connected all your parts to nets, you then can switch to the PCB view. The PCB view will be a mess of parts all over but the important thing is that you can see how they’re connected by a yellow line. This is the virtual wire of the net. Organize your parts and click that ratnest button often. Don’t get too attached to one layout. I wish I had spent more time on one part of the board before moving on to duplicate my layout to the rest (ended up going back and changing all the things multiple times).

Here’s the most important thing I’ve learned when building boards: Take advantage of your copper layers!

I’m sure this is obvious to anyone but a newbie, but each layer of a PCB contains a copper plane. Most simple boards are dual layer, that means you have two planes of copper to work with. You will almost always need to connect many components to ground and power. Use one layer as a ground plane and another as power. Now components that need a ground or power connection get it almost for free, no need to route long traces!

In Eagle you choose the layer you want to work on and draw a polygon then click the ratnest button to connect components to that layer of copper. Note that for top layer components to connect to the bottom copper layer, you will need to use a via.

I submitted the board to OSH Park for fabrication and ordered all the parts off mouser. Excited to test out the board. Next post I will talk about how assembling the board using SMD components go (I have three boards on the way, bound to screw up :)). Fingers crossed.

December Meeting Recap

Whoa. A meeting recap.

post-30210-neo-woah-gif-whoa-mind-blown-t-ikvq

So what did we all do?

Caleb – Presented on Crafting Digital Radio Signals, to Control Things

He has a blog post about his Digital Radio Signals, and that was a majority of what was presented.  He was able to do a live demo of the capture of a remote outlet, and replay of the capture.

There was also “a peculiar signal hiccup”, wherein the signal to the remote outlet would not be received.  It would be similar to a jamming signal, if jamming radio signals were allowed.  Good thing we abide by all RF rules.

He demonstrated the ability to observe vehicle remote locking, and showed the lock and unlock signal.

njRAT v0.7d – Part Two

A part two would make sense with part one, but ::shrug::

Showed off the njRAT v0.7d that came along for the ride on a torrent. njRAT is a remote-access Trojan that has been used for the last few years. A 2013 report from General Dynamics / Fidelis Cybersecurity Solutions goes over detailed indicators, domains, and TTP’s in conjunction with attacks using njRAT.  It is also apparently up to version 0.9.  The malware is making a comeback, and maybe due to some evasion techniques shown. (or people just continue to be dumb in downloading from torrents.  That could be it too)

If njRAT is run, Hey, Look! It’s detected as a virus!

Instead, do some tech magic (someone can add detail) using Base64 in Microsoft Visual Studio.  Runs now, the EXE is loaded, and it doesn’t trigger alerts or errors.

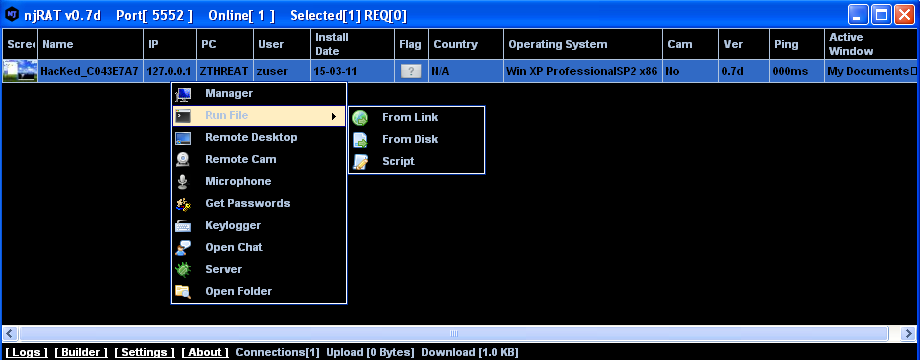
njRAT_panel-3

And hey, we have a remote desktop!

If we turn on the remote webcam function…

…hey!  This is why you should tape over your webcams! And we had keyloggers, microphone access, and chats available too!

So, just don’t trust things that are pirated from the Interwebz.

Do you want this for yourself?  Do a search for njRAT or njRAT v0.7d, and you can have it yourself.  (or, it seems 0.9 is around) You will have to compile/tinker/tech magic it yourself, though.

Picking on Level 3

Well, not directly.  We were shown a few links to see Internet health

Dynatrace , Dynatrace Keynote, and DownDetector

We just couldn’t help noticing how bad Level3 looked at the time.

Hacking the HooToo HT-TM05

So this is a $40 Travel Router, and we can HACK THE SHIT OUT OF IT

HT-TM05-wireless-router

Has WiFi built in, (added?) a 128GBD SSD, and it has a full Linux kernel on it now, OpenWRT, and Powered by LuCi.  Portable power that also lasts a good portion of the day.

Can do a File Server, put movies onto it, or put a web forum on it.  We plan to set one or more of these up and carry them around DEFCON 25.

Relevant GitHub that may be useful

Some were also interested in the PirateBox , that can be built on different hardware for about $35.

Something something CYPHERCON

Yeah.  See @cyphercon or cyphercon.com if you have no clue here.

If you have a better recollection of things from our meeting, good for you! Also, we could probably use that info in this update.  Comment or edit, or e-mail some DC414 folk about your contributions.


February meeting awesomeness and sadness

February was another great meeting. It started with me and ngharo running late then doing the introductions, which there was a lot of. Its always good to see new faces at meetings. Then I broke the sad news that I will be leaving Wisconsin and so dc414 as well, appointed ngharo as new prez and stepped down. Then ngharo said a few words and gave us a glimpse of some of the changes he will be making. Everyone be sure to congratulate ngharo, I can’t wait to see what he does with the place.

Rob started the demos off with hacking a used disposable flash camera and a halogen light bulb to make a handy improvised flash light. I perfect zombie apocalypse type hack. Then he busted out materials for everyone to make their own zombie caution light. It did’t take long for people to start hacking it up even more and did all kinds of crazy things. Vlad was the first to turn things up to 10 by doing something to the transformer in the camera to pump out more voltage and get a brighter light. Then dw5304 and others did their best to blow the capacitors and other things up! Then using the flash bulb that came with the camera and capacitors over 9000 we tried to do some UV tattooing. Next up was Klaiviel doing a key impressioning demo for the newbies in the crowd. Here are some photos of the meeting.

So here it is, my last post on dc414. It has been a fun ride and I will miss everyone. You can still find me on the dc414 irc chan and I will be at meetings via G+ or what ever ngharo sets up for the group. See you out there.

-AA

November meeting recap.

First, many thanks to The Meetupery for hosting our meeting. You guys rock! Klaiviel got things going with his thingy that he plans on trying to make more of “I hope to get one!”. Then we went around the room and found out what everyone is up to. I made a few announcements that will be repeated here on a later date and Ngharo talked about his big plans for the new and improved dc414 PBX! I can’t wait for that to get done 🙂 Then dc5304 attempted to show us a super sweet SDR but ended up showing us how to brick one 😛 Then we talked about a old ass UHF/VHF scanner that you programmed with crystals I found at a yard sale. The one I got had 8 ports but only 5 crystals 4 of which had been identified with the fifth one unknown. We attempted to find the frequency of it but did not have all the right equipment. Anyway I thought it was a cool little piece of radio history so we gave it away along with a few other things. Here are a few pictures from the meeting. Congrats to the big winner college boy!

June Meeting Recap

Thanks to all that attended the June meeting.  Lot’s of interesting discussion and demos as usual.

Some highlights were Klaiviel giving an in-depth look at the state of 3D printing with a focus on weapons and some of the issues surrounding it.

We later headed for the roof of Bucketworks to learn about DirectTV hardware installations and some of the tools the pros use.  We got to learn about different satellites  and had some really good discussions while the ISS zipped past brightly in the night sky.  Thanks Darkwind.

dw5304 took over next and showed off some 40Gb Ethernet gear along with a demo.  We also had fun exploiting some really awful security of a customer management portal that dw5304 stumbled upon.

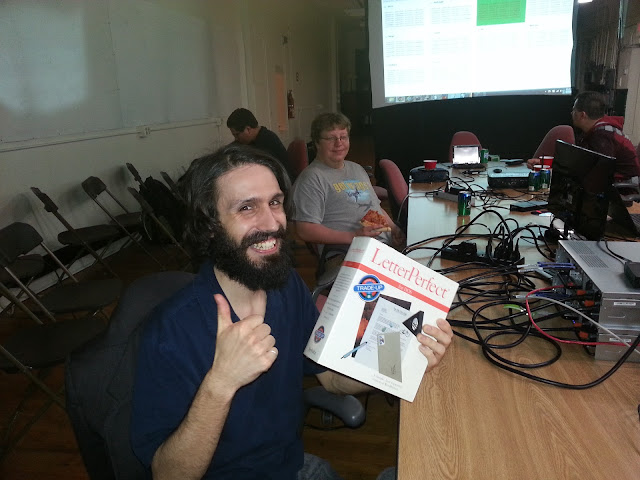
edgewalker was one of the lucky contestants to win the Free Junk Giveaway.  Enjoy the LetterPerfect software on your IBM/DOS compatible PC! 
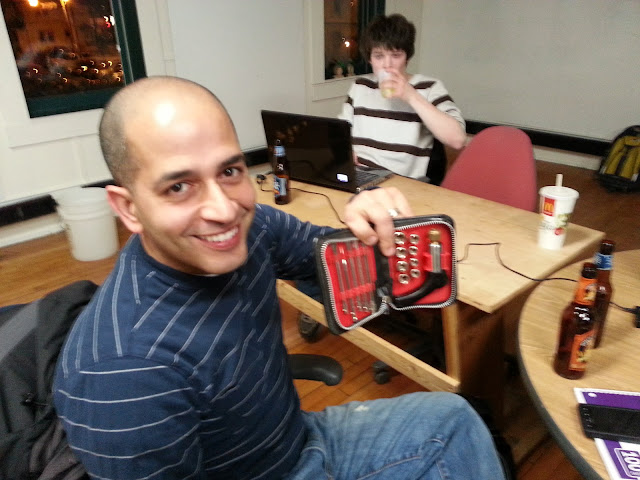
Some pictures courtesy of our beloved overlord, AnarchyAngel.

May meeting recap

The May meeting was another great one. Both Ngharo and my self were late because of traffic and junk so darkwind got things started with his popular demo of sniffing pager messages from the air. I Showed up at the tail end and when he was done I started the introductions. It was good to see all the new faces. After everyone talked for about 15 minutes I gave a live demo on using actionscript “flash” to inject a XSS exploit into a other wise secure website. Then Noize took over and gave a interesting live demo of getting IP addresses from contacts on Skype. Then dw5304 showed some of the features in the untangled firewall software. Congrats to ALee for winning the dc414 free junk giveaway!! Here are some pictures I took of the meeting.

ALee and his winnings!

Cisco DDR2200 ADSL2 Residential Gateway Router Vulnerabilities

I have discovered two Vulnerabilities in the Cisco DDR2200 ADSL2 Residential Gateway Router. The first vulnerability is that this device responds to UPNP multicast packets and UPNP SOAP requests out side of its local area network. Allowing attackers to forward ports and redirect traffic with out being authenticated, all of which can be exploited using dc414’s Upnp Exploiter.

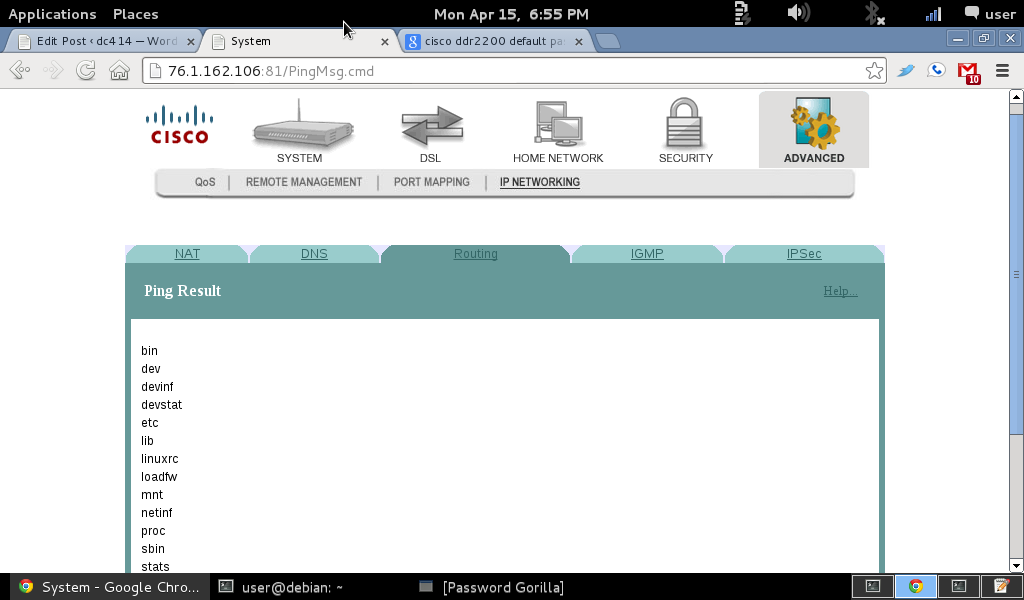
The second vulnerability is remote command execution in the web based ping function. You can inject a pipe “|” followed by your command and it will get run on the shell and return the results as shown below.

Ping PoC: http://192.168.1.254/waitPingqry.cgi?showPingResult=1&pingAddr=127.0.0.1|ls

Screenshot from 2013-04-15 18:55:59

Upnp Exploiter

dc414 and I are proud to introduce Upnp Exploiter! A Upnp scanner and exploit tool. This tool comes with two main scanning functions and exploit functions.

The first scanning functions is the target scan. Here you can pick a single IP or IP range to find anything that reports back to a UPNP multicast packet sent to the normal UPNP broadcast address “239.255.255.250 on port 1900” If target responds it takes a closer look and sees if it can get the targets UPNP profile letting us know what type of device it is, what UPNP functions it supports, its IP, and other information. When used remotely, this all takes advantage of the fact that the target device violates the UPNP specs and responds to UPNP requests outside of the deices local area network.

The second scanning function only works in a local area network and just sends out a UPNP broadcast. This function is just using the UPNP protocol as intended.

Once a list of UPNP supported devices are found the script mines some information from it like device type, UPNP functions, IP. If its a gateway device it prompts you and asks if you want to attempt to exploit it.

The first option is to forward ports. If doing this LAN side its best to do some network recon with NMAP or something, find some fun services running on a internal server and forward them to the web for later hacking. While gathering information on the device it gets a list of other ports forwarded via UPNP and the devices internal IP. This is supper helpful when doing things on the remote side. One of my personal favs is routing the modems internal port 80 to 81 on WAN. This should give you access to the routers internal web UI for configuration. Most of the time the default creds will work for admin access >:)
This of course violates lots of rfc’s, protocols, and other stuff lol.

The second exploit option tries to turn a gateway device into a proxy. Now this works using IP addresses and one host per port. So if you want to connect to Victim A on port 8 you use the script to forward all data coming in on any port you choose “for now we will say 88” to VA on port 80. So you connect to port 88 on the Victim B “the gateway device” and all the traffic is forwarded to VA on port 80. This also breaks UPNP rules, but who cares.

The last little thing this script does is parse the replies for the unique_service_name() vulnerability and reports to you if it finds anything with some helpful information to aid in exploiting it.

You can get the script from the git page HERE. If you like it please consider donating to dc414 or me (Anarchy Angel – anarchy@new.dc414.org) for taking the time to make such an awesome script 🙂 If anyone would like to help with development please contact Anarchy Angel (me).

Many thanks to Ngharo for help with the regex and list stuff.

April meeting recap

Aprils meeting was awesome! Ngharo started us off with room introductions, which was helpful considering all the new faces at this meeting. Next I gave a quick demo of my new tool Upnp Exploiter. Which lead to me disclosing two 0day vulnerabilities in the Cisco DDR2200 ADSL2 Residential Gateway Router “expect more on all this later”! Then dw5304 gave his SNMP demo again and showed all the n00bs how to pwn Cisco routers using SNMP to upload a your own config to them. Then we all started messing around with trying to draw words on an oscilloscope with my arduino. Because of a late start that is all we had time for. Congrats to BigStarHero for winning a Emerson switch board in the free junk giveaway! Here is some pictures from the meeting.

Free junk giveaway big winner!

windows 8/server 2012 unsigned driver hell no more.

So I have this nice new computer that I built with a asus p9x79 motherboard. I wanted it to become a 2012 server for some stuff. After loading the OS I found out that the nic is “incompatible” seeing intel thinks that its a desktop board and should not be used in a server. I went looking though the inf file and found out that it was ignoring the hardware id’s.

[ControlFlags]
ExcludeFromSelect = \
PCI\VEN_8086&DEV_1502,\
PCI\VEN_8086&DEV_1503

Well this sucks…. lets fix it.

I then removed the exludefromselect and the two lines fallowing it.

went to install the modified driver and ended up with image

well at least I know its ok :). Now lets fix the catalog’s hash.

A hunt on google told me I needed inf2cat so lets download it here.

inf2cat /driver:”C:\Driver” /os:8_X64

My new catalog was created :).
went and tried installing my new driver once again and Damm :(… digital signature is missing wtf???? how the hell am I going to fix that I thought.

A little more searching found out we can make a self signed cert and attach it to a driver “he he”…. nice try Microsoft…..

So lets get this sucker signed. download here

makecert -r -n "CN=Intelnic" -pe -ss MyCertStore -sr LocalMachine

Now I needed to export this cert with its private key so we can import it into “Trusted Root CAs” and “Trusted Publishers” on my local machine I was creating the driver and also on the target machine I wanted to install my driver at :).

Now that we have it imported lets sign this sucker.
signtool sign /s MyCertStore /n "Intelnic" /t http://timestamp.verisign.com/scripts/timestamp.dll "C:\Driver\e1c63x64.cat"

Went back to my server installed the cert int trusted root cas and trusted publishers hey look my nic now works :).

it works

Thanks Microsoft for making a “secure” os that has to have drivers that are signed … but wait…. I just made it my self o well there went that idea….