Microsoft Virtualization Event in Brookfield

Just got an email from Microsoft saying they have a virtualization event in brookefield.

Figured since I was going I’d share in case anyone else wants to join me.  Should be worth while.

Starts: Thursday, December 08, 2011 9:00 AM
Ends: Thursday, December 08, 2011 5:00 PM
Time zone: (GMT-06:00) Central Time (US & Canada)

“Sheraton Milwaukee Brookfield

375 S Moorland Rd
Brookfield Wisconsin 53005
United States


Register by Phone: 1-877-MSEVENT 9AM-7PM EST M-F
Meal: Yes
Presenter(s):  Brian Lewis and Matt Hester.
Language(s):  English.
Product(s):  Microsoft System Center Virtual Machine Manager, Windows Azure, Windows Server and Windows Server 2008 R2.
Audience(s):  IT Generalist.”or register here

PXE Boot Primer for Windows

by dw5304 AT dc414.org

PXE Boot Primer: Part One

We are creating a network boot environment for installing OS and running diagnostic utilities.

Configure your DHCP server

I chose dd-wrt because of its ability to set the DHCP options for the next-server and bootp options easily.  For a list of supported dd-wrt routers see here.  You can do this from Windows server, Linux, or any other DHCP server that support BootP as well.

If you have issues getting dd-wrt to install please read the information that’s listed on their site for setup.  Log into your router, in my case its 10.10.1.1, click on services tab and in the additional dnsmaq options place the following where 10.10.1.5 is going to be your TFTP server.

Additional DNSMasq Options:
dhcp-boot=pxelinux.0,, 10.10.1.5


Make sure to hit apply settings and lets continue installing our TFTP server

Configure your TFTP Server

I am using tftpd for Window: 32bit install, 64bit install.

If we are running Windows we should add tftpd service to the firewall exception list.  You can allow a program through the firewall via Control Panel.

Open Ttpd settings and  remove all items except for tftp_server and tftp_client, then lets click the tab for tftp set security to none (TFTPd is not an encrypted channel.  You should be using firewall ACLs to limit access to the server).   Check the box for Option negotiation, Translate Unix file names , and Allow virtual \ .  Everything else should be unchecked.


tftpd options

Create a TFTP root directory.  In my case I chose C:\tftp-root\.  Extract the boot files into this directory.  Download files here.

Windows Automated Installation

Download the Windows AIK.  Burn the image to a disc or mount the ISO and run the Windows AIK setup. You can just hit next though the whole setup process.

Windows AIK Setup

Now click on Deployment Tools Command Prompt shortcut on desktop or in your start menu.  Now run “copype.cmd Arch C:\DESTINATION” (where ARCH = x86 (32bit), amd64 (64bit), ia64 (Itanium) and DESTINATION is where you’d like the output the data files for the image we will be creating to reside.)

copype.cmd ARCH C:\DESTINATION
Dumping a x86 image to c:\winpe_x86

Bootloader

Mount the image that was created for us.  Make sure to replace winpe_x86 with your destination used in the previous step.

imagex /mountrw c:\winpe_x86\winpe.wim 1 c:\winpe_x86\mount

Copy the files for PXE boot to the tftp-root \boot folder.

copy mount\Windows\Boot\PXE\*.* C:\TFTP-Root\Boot

Copy boot.sdi from AIK to the TFTP folder.

copy "c:\Program Files\Windows AIK\Tools\PETools\x86\boot\boot.sdi" C:\TFTP-Root\Boot

Copy pxeboot.n12 to pxeboot.0 so it will work with our syslinux bootloader.  Syslinux only seems to take *.0 file extension.

copy c:\TFTP-Root\Boot\pxeboot.n12 c:\TFTP-Root\Boot\pxeboot.0

Next copy bootmgr.exe to the root of the tftp-root folder

copy c:\TFTP-Root\Boot\bootmgr.exe c:\TFTP-Root\

Windows might complain if it can’t find boot.ini in the TFTP root, so let’s create it.

echo > C:\TFTP-Root\boot.ini

We need to create the BCD (Boot Configuration Data) for the PXE environment to load the WIM (Windows Install Media)  file’s (this is a great line to use on chicks).  Note: I found following Microsoft’s instructions for this step resulted in fail.

bcdedit -createstore C:\winpe_x86\BCD
Bcdedit /store c:\winpe_x86\BCD -create {ramdiskoptions}
Bcdedit /store c:\winpe_x86\BCD -set {ramdiskoptions} ramdisksdidevice boot
Bcdedit /store c:\winpe_x86\BCD -set {ramdiskoptions} ramdisksdipath \boot\boot.sdi
Bcdedit /store c:\winpe_x86\BCD -create /d "Windows 32bit installers" /application osloader

If this is all proper it will return a GUID.  We need this in order to create a boot entry.

BCD Setup

Now that we have our guid for the windows 32bit installers we need to tell it what to do. If you want to also create a 64bit  osloader run the last command again to create a new guid. (Bcdedit /store c:\winpe_x86\BCD -create /d “Windows 64bit installers” /application osloader) with a different description aka “windows 64bit installers”. Replace {guid1} with the guid of your bcd entry mine is {3e04a3b3-dcdf-11e0-894c-d1514d26a539}.Your bcd guid will be different. Make sure to include the {}. If u want to use a different wim file please also update it accordingly.

Bcdedit /store c:\winpe_x86\BCD -set {guid1} systemroot \Windows
Bcdedit /store c:\winpe_x86\BCD -set {guid1} detecthal Yes
Bcdedit /store c:\winpe_x86\BCD -set {guid1} winpe Yes
Bcdedit /store c:\winpe_x86\BCD -set {guid1} osdevice ramdisk=[boot]\Boot\winpex86.wim,{ramdiskoptions}
Bcdedit /store c:\winpe_x86\BCD -set {guid1} device ramdisk=[boot]\Boot\winpex86.wim,{ramdiskoptions}

Now I’m going to add an x64 entry for my boot environment you can skip this setup if u wish.

bcdedit /store c:\winpe_x86\BCD -create /d "Windows 64bit Installers" /application osloader
Bcdedit /store c:\winpe_x86\BCD -set {guid2} systemroot \Windows
Bcdedit /store c:\winpe_x86\BCD -set {guid2} detecthal Yes
Bcdedit /store c:\winpe_x86\BCD -set {guid2} winpe Yes
Bcdedit /store c:\winpe_x86\BCD -set {guid2} osdevice ramdisk=[boot]\Boot\winpex64.wim,{ramdiskoptions}
Bcdedit /store c:\winpe_x86\BCD -set {guid2} device ramdisk=[boot]\Boot\winpex64.wim,{ramdiskoptions}

now we need to create the bootmgr settings. I set my time out to 99999 you can shorten this if u want.

Bcdedit /store c:\winpe_x86\BCD -create {bootmgr} /d "Windows Pe BootManager"
Bcdedit /store c:\winpe_x86\BCD -set {bootmgr} timeout 99999
Bcdedit /store c:\winpe_x86\BCD /displayorder {guid1} {guid2}

Now copy bcd to tftp root\Boot folder by copy C:\winpe_x86\BCD C:\TFTP-Root\Boot

We should now be able to test to make sure everything works in terms of bcd. Start up a new computer, and tell it to boot from the pxe environment. Then hit enter when the syslinux menu show up.

we can see it works! Good job. Now we need to create wim files and the rest of the scripting.

Lets edit the winpe_x86 image we mounted earlier.
We want to edit and make changes to windows\system32\startnet.cmd ( this file is the first thing the WIM file runs. It basically sets up drivers and network access.)

and make it say

wpeinit
main.cmd
W:\scripts\main.cmd

now make a new file in the mount\windows\system32\ called main.cmd
echo >mount\windows\system32\main.cmd

next edit main.cmd and make it say

@echo off
echo mapping drive.
echo trying dc414 pxe setup
net use W: \\ip_or_host\win
echo example of second network try
net use W: \\ip_or_host\win
echo starting main.cmd
W:\scripts\main.cmd

Replace ip_or_host with an ip address or host name. If you have more than one network in your setup you can add another ip or host for the other network. Just do another net use command.

Installing network drivers:
we will go and download the network driver packs from http://driverpacks.net/driverpacks/latest
make sure you download the proper x64 or x86 drivers ( you will need a torrent client to do this). Extract the files to a temp dir in side of the win_x86 folder\drivers now we want to recursively add all the drivers from this driver pack.

Now we add all the drivers recursively into the package.
Dism /Image:C:\winpe_x86\mount /Add-Driver /Driver:c:\winpe_x86\drivers /Recurse

After you get done modifying this image your done with this wim and we need to commit the changes.
imagex /unmount /commit C:\winpe_x86\mount

Now lets copy this wim to our tftp-root\Boot folder
copy winpe.wim C:\TFTP-Root\Boot\winpex86.wim
Lets see if our Wim file we just created boots and works as expected.

It dose we have successfully gotten our wim file to boot. Now we need to setup the share on the windows workstation. Inside the tftp-root folder there is a folder called “win” we need to share this folder with access to everyone.  If  this is not done you need to specify a user name and a password inside your net use command in the wim image.

Now we need to add our windows installations  to this win folder and update the choice menu that boots from the network share…

All that’s needed is the setup.exe and the sources folder that contains the install.wim you can delete boot.wim to save space.

Example of my setup. For win32 entry. Win64 I just change it say 64 instead of 32 and when a new sp comes out I usually add the number to the folder.

When the system boot it runs main32.cmd or main64.cmd (from tftp-root\win\scripts\)depending on what was put in earlier for main.cmd on the wim file. then calls install32.cmd or install64.cmd. These two files contains the menu system for the installer your operating systems. Along with these batch scripts there is also choise64.exe and choise32.exe they run bases on the install script you are running seeing the x86 and the x64 do not include the subsystem that supports each other… you will see a subsystem not support cause of the exe that runs and switches the window… (cmdow.exe) some antiviruses will see this as a virus and will delete it. Its safe, its being detected because of that it dose. It hides the command line window and brings up the setup exe in front of the cmd window that’s open…
To add or edit more entries into the install32.cmd or install64.cmd just add an , and the next number them make an entry for that option.

Now if you want x64 do the same thing but replace all instances of x86 with x64 or 32 with 64.
And then copy the winpe.wim to winpex64.wim to the C:\tftp-root\Boot folder. If we want to boot to an iso for other diagnostic tools we need to add entries to C:\tftp-root\pxelinux.cfg\default its easiest to add a menu to go to another menu to make it easier and cleaner. Place a new file in the c:\tftp-boot\menu folder usaly I make them end w/ a .cfg so u can edit them menu system. For instance lets add a menu system to give us options to run a hdd test.

Open C:\tftp-root\pxelinux.cfg\default

now lets add an entry for this hdd diag tool.

LABEL HDDtools
Menu LABEL Hard Drive Testing Tools
kernel vesamenu.c32
append menu/hdd.cfg
TEXT HELP
Hard Drive Diagnostic Tools
ENDTEXT

Now we need to make a file called hdd.cfg in side the menu folder and make it boot our images. Place all these files inside the util folder for img and other image files and place iso in side of the iso folder. Link to them accordingly.

Contents of hdd.cfg

if we want to boot an iso we want to do a
LABEL AcronisDiskDirector
LINUX memdisk
APPEND iso
INITRD iso/Adds.iso

We can also boot basically anything we want just need to create a menu system. That will take us there. We can also add a password to the menu system if we don’t want someone to get access to certain things.

MENU PASSWD passwd
(Only valid after a LABEL statement, or a MENU BEGIN statement.)
Sets a password on this menu entry. "passwd" can be either a cleartext password, a SHA-1 encrypted password (starting with $4$), or and MD5 encrypted password (starting with $1$).
You can protect an entire submenu by using "MENU PASSWD" after the submenu's "MENU BEGIN."
Use the included Perl scripts "sha1pass" or "md5pass" to encrypt passwords. MD5 passwords are compatible with most Unix password file utilities; SHA-1 passwords are probably unique to SYSLINUX. Obviously, if you don't encrypt your passwords they will not be very secure at all.
If you are using passwords, you want to make sure you also use the settings "NOESCAPE 1", "PROMPT 0", and either set "ALLOWOPTIONS 0" or use a master password (see below.)
If passwd is an empty string, this menu entry can only be unlocked with the master password.

MENU MASTER PASSWD passwd
Sets a master password. This password can be used to boot any menu entry, and is required for the [Tab] and [Esc] keys to work.

To generate a password use openssl passwd -1 mypassword

Example:

In my case its test

Trouble shooting:
If you get an unmountable boot volume its cause there is no ramdisk options in your bcd config please reread the instructions on how to setup bcd.

Network card is not detected in pxe env. Go to manufactures website and download there network card driver, and run the add driver commands.

If you get a ip fragment please open up your registery and goto [HKEY_LOCAL_MACHINE\SYSTEM\CurrentControlSet\services\Tcpip\Parameters\Interfaces\guid for my network card
and setting MTU to 1492 and rebooting the system once you do that error should resolve its self.
If you get a gray screen on the syslinux menu its problem because the name was spelled wrong. Check the tftp log and correct spelling if it is the case.

Sweet Star Trek Enterprise mod for the desktop.

So my wife got me this awesome Star Trek Enterprise model with working lights and a play able recording of the intro to the original series for $10 at a rummage sale. Only issue was the batteries have been in there for ages and was all busted open, acid all over, and crossion everywhere inside. I did my best to clean it all but still it was a mess. Rather then wasting more batteries I decided to make a little modification and have it run off of USB power! The voltage is just about the same, the model runs off 4.5v and USB outputs around 5v “this will vary from machine to machine, even port to port in some cases”. For example when I hooked it up to my laptop the brightness and everything was perfect, but when I connected to a desktop machine at work the lights got very bright and hot fast, I solved this by attaching a non-powered USB hub and connecting the model to that. Below are a few pictures I took from the mod. Ok that is it, enjoy!

Here is a close up of my new toy:

Here is the USB cable I used:

Here is the cable attached to the base:

Here is the cable soldered to the main board in the base:

And here is the finished project:

dc414 November meeting’s awesomeness

Well Novembers meeting was one of our best for sure! Many thanks to James and Bucketworks for putting the safe opening event together and letting us play with your locks and junk, you are the best! It all started with everyone just fucking off enjoying some snacks, cold beers, and some tunes. Then Klaiviel and James got the party started.

Klaiviel gave us a little intro to the safe, its lock, and some of the history all the while James was playing the roll of Geraldo all too well and dropping the lulz like no one. Once the safe was open there was a mad dash to see what was inside!! Lots of brooms, paper and some beta tapes suspected to be vintage pron. Cmoney took lots of pictures and video “below” of the safe opening.

After the party died down a little bit we talked about a issue one of our members is having with china and how to resolve them. Then ngharo and I gave a small demo on physical security and some of the tools one might use. We focused on Switchblade and an Arduino USB keyboard emulator “this is a post for another day” to pwn the shit out of windows, man that was fun. Ok thats it, peace.

F4r4d4y jr won an IE6 admin pack
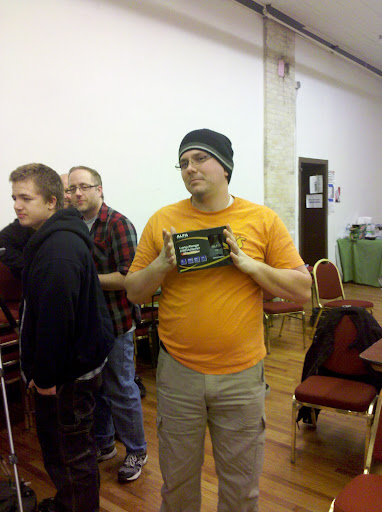
Winner of free dc414 junk

The following videos are just og the safe opening and viewing of the contents:
pt1

pt2

Full video of the party
http://www.ustream.tv/recorded/18313140


dc414 Halloween party

Here are some pictures from the dc414 Halloween party. Me and dw5304 messed with an arduino project I have been working on and Klaiviel gave us a little preview of some sweet safe locks hes bringing to the next meeting then later him and I had a little nerf war!!! My ass was thoroughly kicked, lol. Many thanxs to Ulic and his wife for hosting the party! We had a blast!

My lame IR copy toy pt2

Some of you might remember the first post on my lame IR copy toy. Well I have tweaked the code a little and put it all on a nice little PCB board that fits great over the Arduino, here is the “finished” project:

Heres some video of it working:

Heres it being used to control a helicopter:

Here is the code:

One thing I left out of my first post is in order for this to work you have to use this IR remote library from Ken Shirriff. Thats it, peace.

Internet in Peril

Got this alarming email from the good folks at SavetheInternet.com and thought I should share it with the rest of you.

Dear dc414,

You’ve heard from me a lot recently about the “resolution of disapproval” (S.J. Res. 6) against Net Neutrality, which extremists plan to push through the Senate.

There’s a reason for all the emails: This dangerous resolution would hand over control of the Internet to companies like AT&T, Comcast and Verizon while stripping the FCC of any authority to protect users’ online rights.

The vote on this resolution could happen as early as next week. So we need you to be a part of Free Press’ national call-in campaign to make one thing absolutely clear to Congress: “Corporations can’t take the Internet away from us.”

Please pick up the phone now and call Sens. Herb Kohl and Ron Johnson. Tell them: “Don’t sell out our basic right to communicate online. Vote ‘no’ on the resolution of disapproval.”

We’ve created an easy-to-use “whiplist” that helps you make the call. Just enter your zip code, find your senators and click their names. We’ve also provided a sample call script should you need to use some talking points.

Here’s the thing our senators need to know: An overwhelming majority of Americans want an open Internet. Period. We don’t want corporations blocking what we say or do online. We want every website, from the biggies like Amazon and Google to sites operated by millions of small businesses and bloggers, to be treated the same, with no fast lanes for companies with deep pockets.

These are simple, common-sense demands, and it’s time our senators heard them.

So pick up the phone, call your senators and demand they vote “no” on this resolution of disapproval. We’ll follow up on our progress as we get closer to the vote.

Thanks for everything you do,

Josh Levy
Associate Campaign Director
Free Press Action Fund
SavetheInternet.com

So if you like the freedom of the net, call your senator now to preserve it, I already did. 🙂

October meeting recap.

October’s meeting was awesome as always and we had a few new faces which is always a good thing! We all hacked away at Windows Server 8 for a bit and found a few bugs, but unfortunately for the n00bs the meeting didn’t really get popping until after they let :/

ngharo gave us all a great talk on the wall of sheep. How he coded it, what he coded it in, what other software was used, and all the challenges that came up along the way. Dark Wind brought a toy remote controlled helicopter that uses IR for control, we found out my IR copy toy could be used to copy codes from the remote and take control of the helicopter 🙂 I was excited to finally get to use my 1337 IR copy toy on something!!

After all the IR fun there was a little talk about making a arduino based safe cracker to get into the safe at Bucketworks, that should be a cool project once its all done. Then I showed everyone how to make their own resisters with little more the a piece of paper and a pencil. The DIY fun didn’t stop there, I also demo’ed how to make capacitors using just tin foil, cling wrap, tap and some wire! Then while trying to make the home made capacitor blow up we did found out that if you expose it to high voltage, like the kind coming out of a wall outlet, it will start buzzing and expanding 🙂

A congrats to Dark Wind on winning the dc414 free junk give away, he got Red Hat Linux 6.1 enterprise with the extended support package 😛 Here is some pictures courtesy of cmoney “tyvm cmoney”, I didn’t get a pic of Dark Wind with his winning because, idk, I failed. Ok thats it see you next time.