by dw5304 AT dc414.org
PXE Boot Primer: Part One
We are creating a network boot environment for installing OS and running diagnostic utilities.
Configure your DHCP server
I chose dd-wrt because of its ability to set the DHCP options for the next-server and bootp options easily. For a list of supported dd-wrt routers see here. You can do this from Windows server, Linux, or any other DHCP server that support BootP as well.
If you have issues getting dd-wrt to install please read the information that’s listed on their site for setup. Log into your router, in my case its 10.10.1.1, click on services tab and in the additional dnsmaq options place the following where 10.10.1.5 is going to be your TFTP server.
Additional DNSMasq Options:

dhcp-boot=pxelinux.0,, 10.10.1.5

Make sure to hit apply settings and lets continue installing our TFTP server
Configure your TFTP Server
I am using tftpd for Window: 32bit install, 64bit install.
If we are running Windows we should add tftpd service to the firewall exception list. You can allow a program through the firewall via Control Panel.
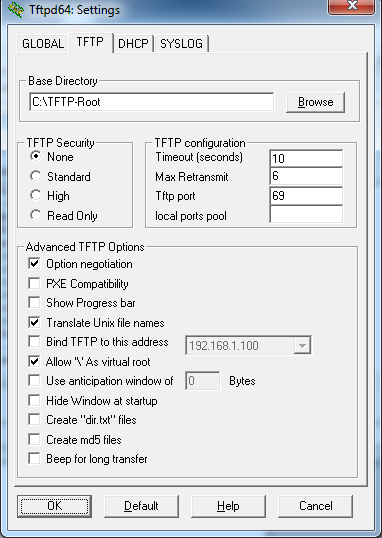
Open Ttpd settings and remove all items except for tftp_server and tftp_client, then lets click the tab for tftp set security to none (TFTPd is not an encrypted channel. You should be using firewall ACLs to limit access to the server). Check the box for Option negotiation, Translate Unix file names , and Allow virtual \ . Everything else should be unchecked.
Create a TFTP root directory. In my case I chose C:\tftp-root\. Extract the boot files into this directory. Download files here.
Windows Automated Installation
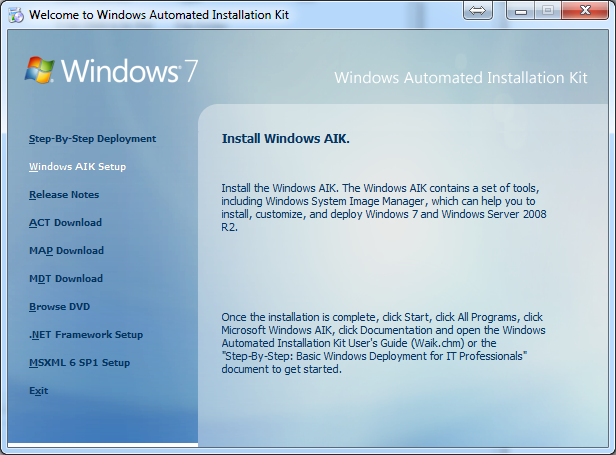
Download the Windows AIK. Burn the image to a disc or mount the ISO and run the Windows AIK setup. You can just hit next though the whole setup process.
Now click on Deployment Tools Command Prompt shortcut on desktop or in your start menu. Now run “copype.cmd Arch C:\DESTINATION” (where ARCH = x86 (32bit), amd64 (64bit), ia64 (Itanium) and DESTINATION is where you’d like the output the data files for the image we will be creating to reside.)
copype.cmd ARCH C:\DESTINATION
 Dumping a x86 image to c:\winpe_x86
Bootloader
Mount the image that was created for us. Make sure to replace winpe_x86 with your destination used in the previous step.
imagex /mountrw c:\winpe_x86\winpe.wim 1 c:\winpe_x86\mount
Copy the files for PXE boot to the tftp-root \boot folder.
copy mount\Windows\Boot\PXE\*.* C:\TFTP-Root\Boot
Copy boot.sdi from AIK to the TFTP folder.
copy "c:\Program Files\Windows AIK\Tools\PETools\x86\boot\boot.sdi" C:\TFTP-Root\Boot
Copy pxeboot.n12 to pxeboot.0 so it will work with our syslinux bootloader. Syslinux only seems to take *.0 file extension.
copy c:\TFTP-Root\Boot\pxeboot.n12 c:\TFTP-Root\Boot\pxeboot.0
Next copy bootmgr.exe to the root of the tftp-root folder
copy c:\TFTP-Root\Boot\bootmgr.exe c:\TFTP-Root\
Windows might complain if it can’t find boot.ini in the TFTP root, so let’s create it.
echo > C:\TFTP-Root\boot.ini
We need to create the BCD (Boot Configuration Data) for the PXE environment to load the WIM (Windows Install Media) file’s (this is a great line to use on chicks). Note: I found following Microsoft’s instructions for this step resulted in fail.
bcdedit -createstore C:\winpe_x86\BCD

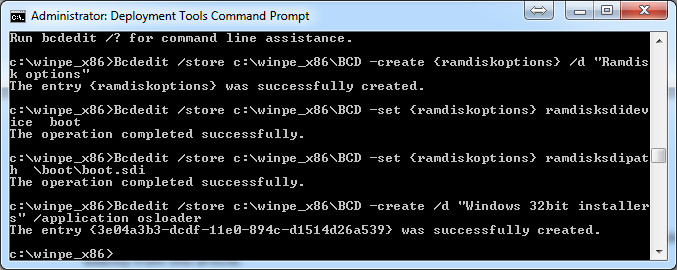
Bcdedit /store c:\winpe_x86\BCD -create {ramdiskoptions}

Bcdedit /store c:\winpe_x86\BCD -set {ramdiskoptions} ramdisksdidevice boot

Bcdedit /store c:\winpe_x86\BCD -set {ramdiskoptions} ramdisksdipath \boot\boot.sdi

Bcdedit /store c:\winpe_x86\BCD -create /d "Windows 32bit installers" /application osloader
If this is all proper it will return a GUID. We need this in order to create a boot entry.
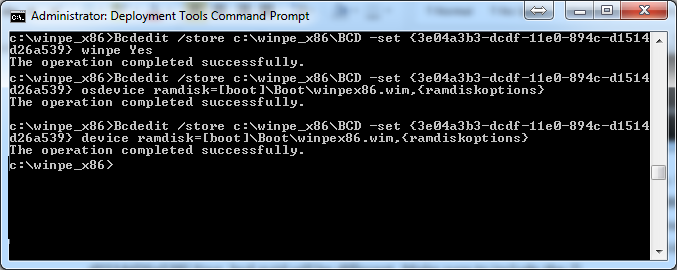
Now that we have our guid for the windows 32bit installers we need to tell it what to do. If you want to also create a 64bit osloader run the last command again to create a new guid. (Bcdedit /store c:\winpe_x86\BCD -create /d “Windows 64bit installers” /application osloader) with a different description aka “windows 64bit installers”. Replace {guid1} with the guid of your bcd entry mine is {3e04a3b3-dcdf-11e0-894c-d1514d26a539}.Your bcd guid will be different. Make sure to include the {}. If u want to use a different wim file please also update it accordingly.
Bcdedit /store c:\winpe_x86\BCD -set {guid1} systemroot \Windows

Bcdedit /store c:\winpe_x86\BCD -set {guid1} detecthal Yes

Bcdedit /store c:\winpe_x86\BCD -set {guid1} winpe Yes

Bcdedit /store c:\winpe_x86\BCD -set {guid1} osdevice ramdisk=[boot]\Boot\winpex86.wim,{ramdiskoptions}

Bcdedit /store c:\winpe_x86\BCD -set {guid1} device ramdisk=[boot]\Boot\winpex86.wim,{ramdiskoptions}
Now I’m going to add an x64 entry for my boot environment you can skip this setup if u wish.
bcdedit /store c:\winpe_x86\BCD -create /d "Windows 64bit Installers" /application osloader

Bcdedit /store c:\winpe_x86\BCD -set {guid2} systemroot \Windows

Bcdedit /store c:\winpe_x86\BCD -set {guid2} detecthal Yes

Bcdedit /store c:\winpe_x86\BCD -set {guid2} winpe Yes

Bcdedit /store c:\winpe_x86\BCD -set {guid2} osdevice ramdisk=[boot]\Boot\winpex64.wim,{ramdiskoptions}

Bcdedit /store c:\winpe_x86\BCD -set {guid2} device ramdisk=[boot]\Boot\winpex64.wim,{ramdiskoptions}
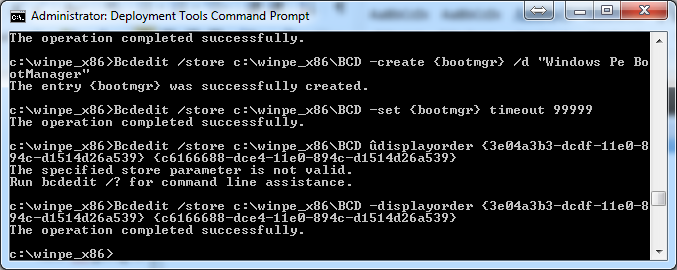
now we need to create the bootmgr settings. I set my time out to 99999 you can shorten this if u want.
Bcdedit /store c:\winpe_x86\BCD -create {bootmgr} /d "Windows Pe BootManager"

Bcdedit /store c:\winpe_x86\BCD -set {bootmgr} timeout 99999

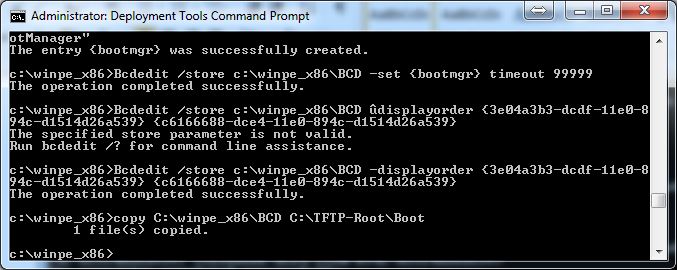
Bcdedit /store c:\winpe_x86\BCD /displayorder {guid1} {guid2}
Now copy bcd to tftp root\Boot folder by copy C:\winpe_x86\BCD C:\TFTP-Root\Boot
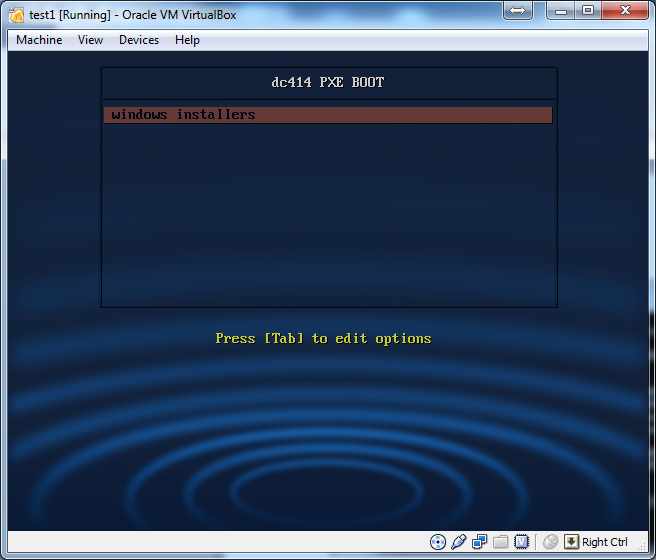
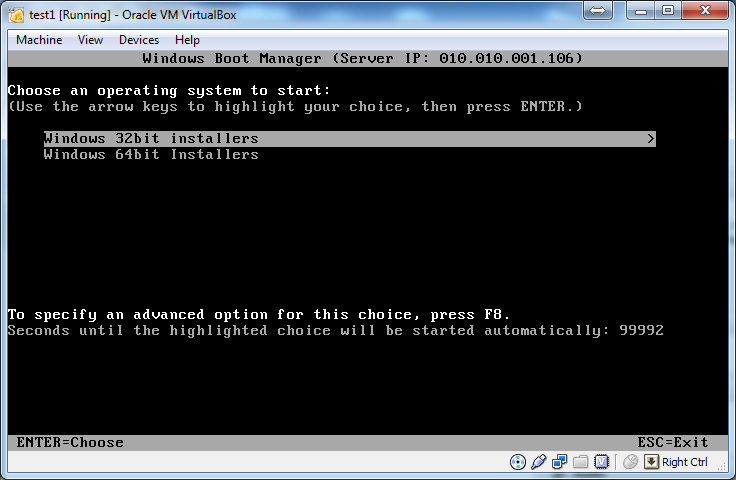
We should now be able to test to make sure everything works in terms of bcd. Start up a new computer, and tell it to boot from the pxe environment. Then hit enter when the syslinux menu show up.
we can see it works! Good job. Now we need to create wim files and the rest of the scripting.
Lets edit the winpe_x86 image we mounted earlier.
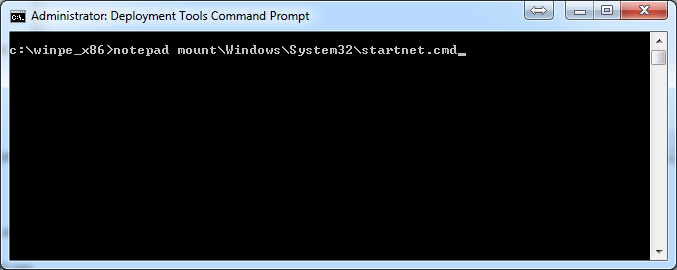
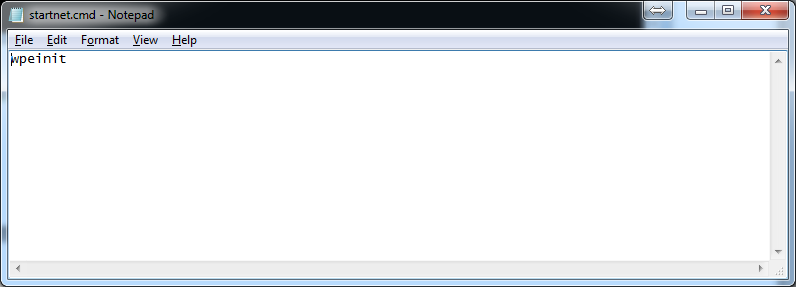
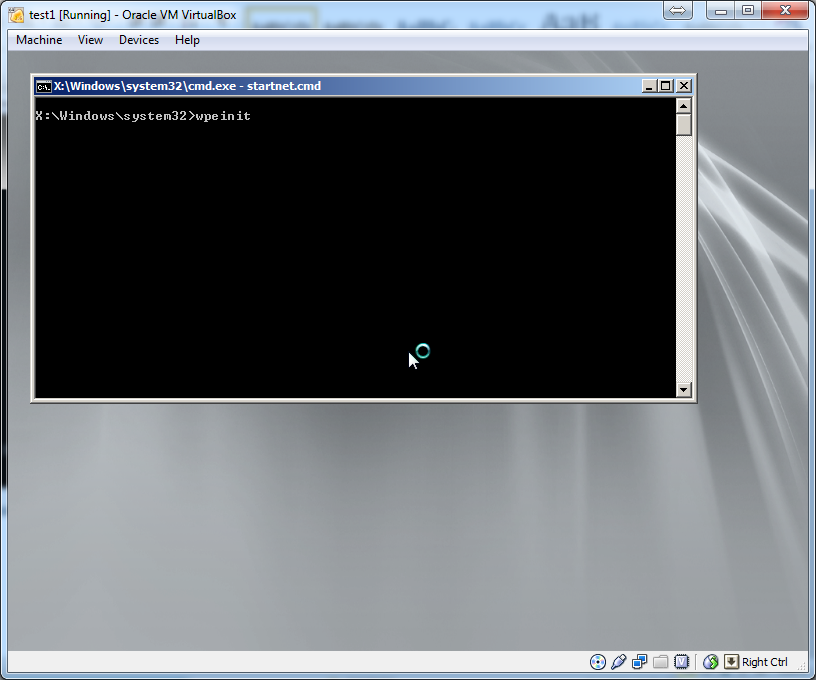
We want to edit and make changes to windows\system32\startnet.cmd ( this file is the first thing the WIM file runs. It basically sets up drivers and network access.)
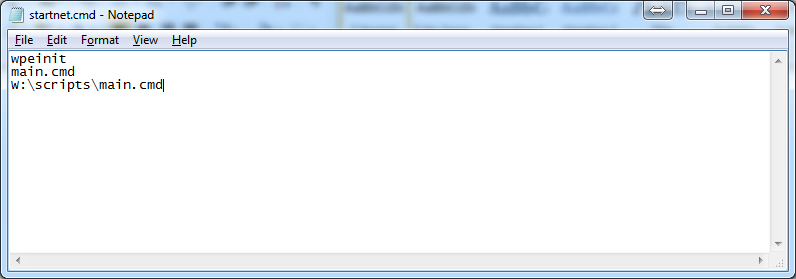
and make it say
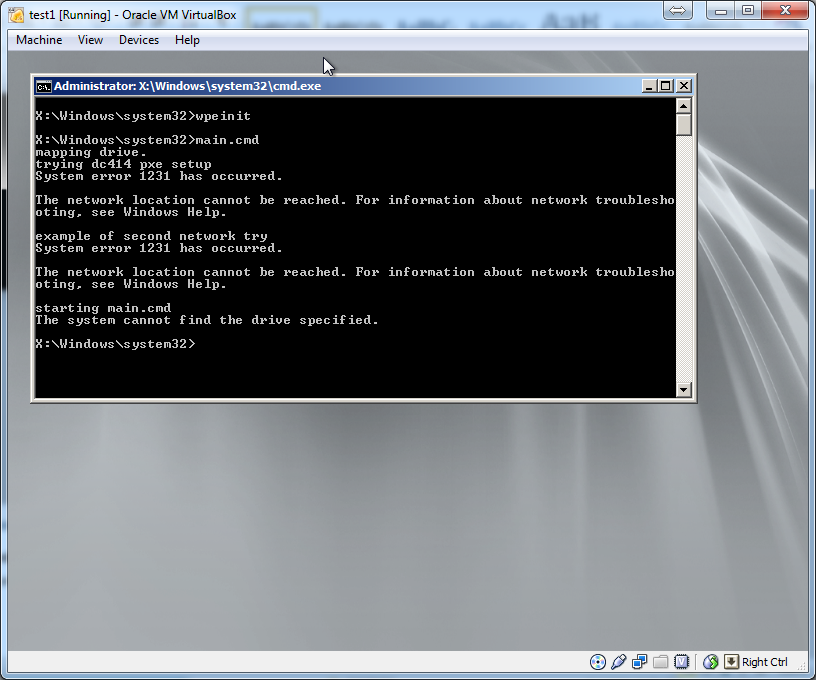
wpeinit

main.cmd

W:\scripts\main.cmd
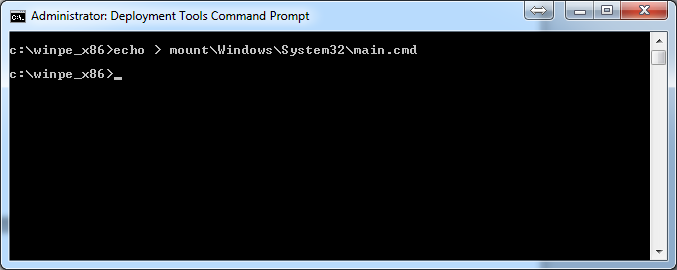
now make a new file in the mount\windows\system32\ called main.cmd
echo >mount\windows\system32\main.cmd
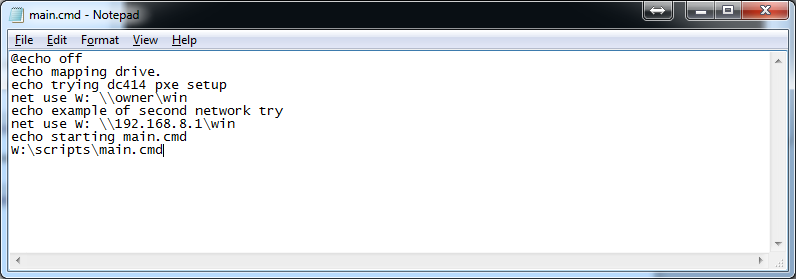
next edit main.cmd and make it say
@echo off

echo mapping drive.

echo trying dc414 pxe setup

net use W: \\ip_or_host\win

echo example of second network try

net use W: \\ip_or_host\win

echo starting main.cmd

W:\scripts\main.cmd
Replace ip_or_host with an ip address or host name. If you have more than one network in your setup you can add another ip or host for the other network. Just do another net use command.
Installing network drivers:
we will go and download the network driver packs from http://driverpacks.net/driverpacks/latest
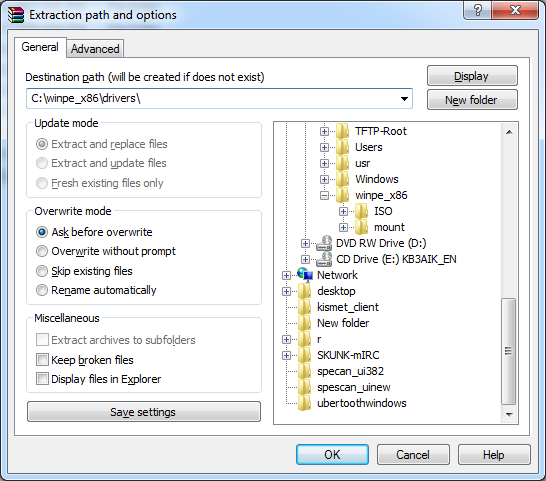
make sure you download the proper x64 or x86 drivers ( you will need a torrent client to do this). Extract the files to a temp dir in side of the win_x86 folder\drivers now we want to recursively add all the drivers from this driver pack.
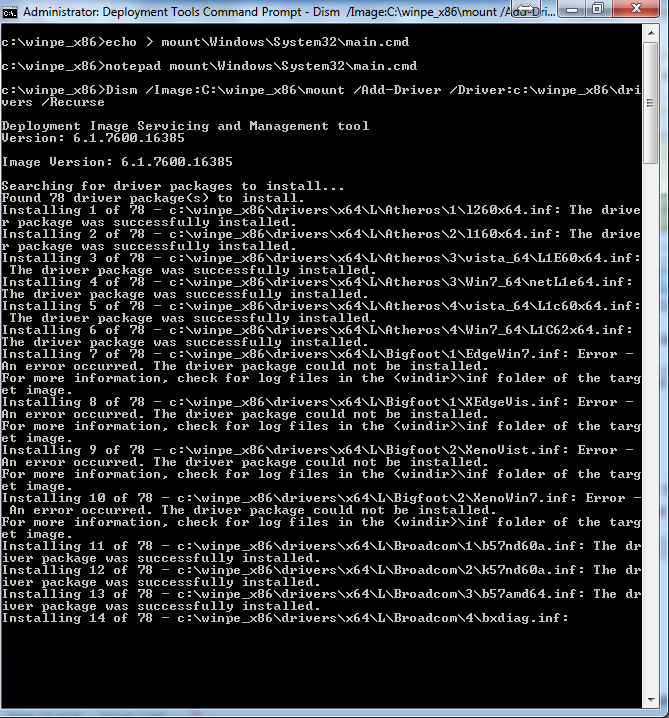
Now we add all the drivers recursively into the package.
Dism /Image:C:\winpe_x86\mount /Add-Driver /Driver:c:\winpe_x86\drivers /Recurse
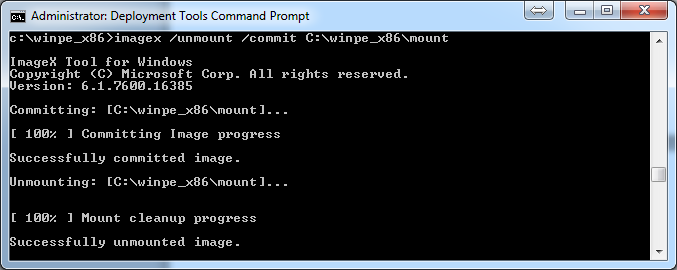
After you get done modifying this image your done with this wim and we need to commit the changes.
imagex /unmount /commit C:\winpe_x86\mount
Now lets copy this wim to our tftp-root\Boot folder
copy winpe.wim C:\TFTP-Root\Boot\winpex86.wim
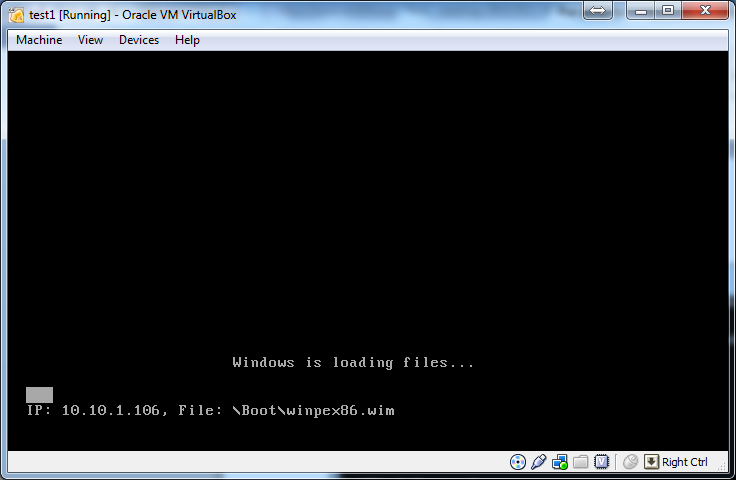
Lets see if our Wim file we just created boots and works as expected.
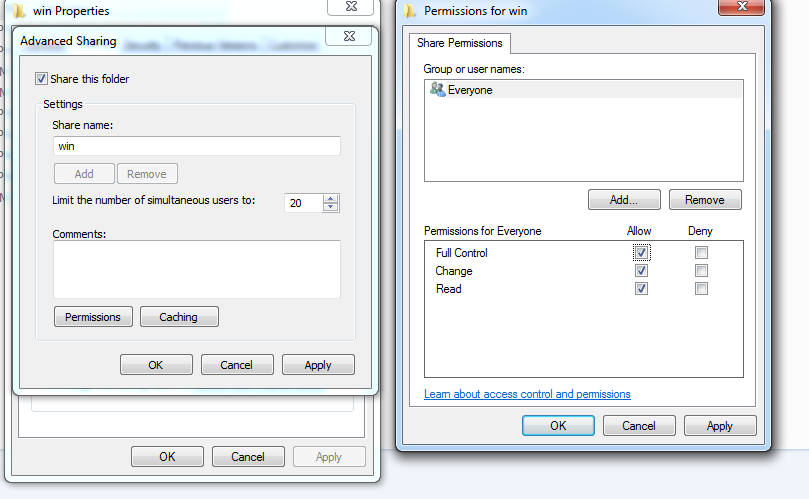
It dose we have successfully gotten our wim file to boot. Now we need to setup the share on the windows workstation. Inside the tftp-root folder there is a folder called “win” we need to share this folder with access to everyone. If this is not done you need to specify a user name and a password inside your net use command in the wim image.
Now we need to add our windows installations to this win folder and update the choice menu that boots from the network share…
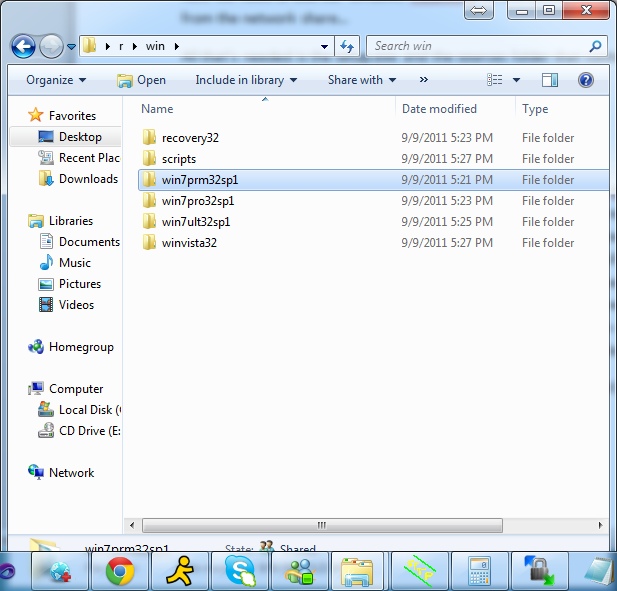
All that’s needed is the setup.exe and the sources folder that contains the install.wim you can delete boot.wim to save space.
Example of my setup. For win32 entry. Win64 I just change it say 64 instead of 32 and when a new sp comes out I usually add the number to the folder.
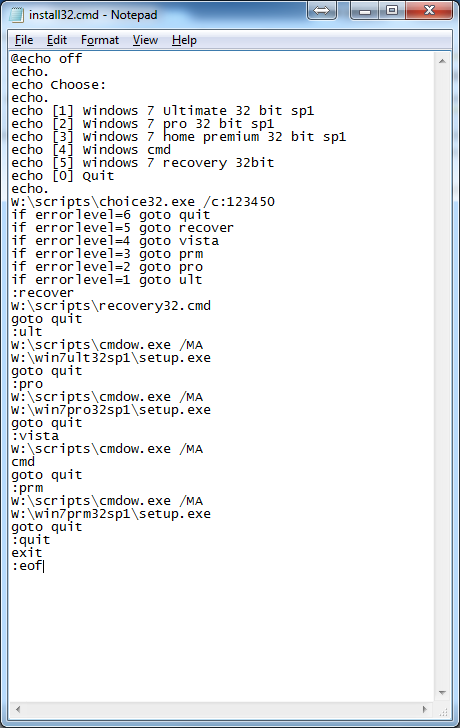
When the system boot it runs main32.cmd or main64.cmd (from tftp-root\win\scripts\)depending on what was put in earlier for main.cmd on the wim file. then calls install32.cmd or install64.cmd. These two files contains the menu system for the installer your operating systems. Along with these batch scripts there is also choise64.exe and choise32.exe they run bases on the install script you are running seeing the x86 and the x64 do not include the subsystem that supports each other… you will see a subsystem not support cause of the exe that runs and switches the window… (cmdow.exe) some antiviruses will see this as a virus and will delete it. Its safe, its being detected because of that it dose. It hides the command line window and brings up the setup exe in front of the cmd window that’s open…
To add or edit more entries into the install32.cmd or install64.cmd just add an , and the next number them make an entry for that option.
Now if you want x64 do the same thing but replace all instances of x86 with x64 or 32 with 64.
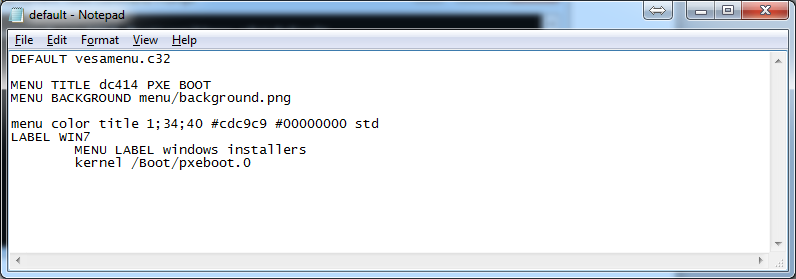
And then copy the winpe.wim to winpex64.wim to the C:\tftp-root\Boot folder. If we want to boot to an iso for other diagnostic tools we need to add entries to C:\tftp-root\pxelinux.cfg\default its easiest to add a menu to go to another menu to make it easier and cleaner. Place a new file in the c:\tftp-boot\menu folder usaly I make them end w/ a .cfg so u can edit them menu system. For instance lets add a menu system to give us options to run a hdd test.
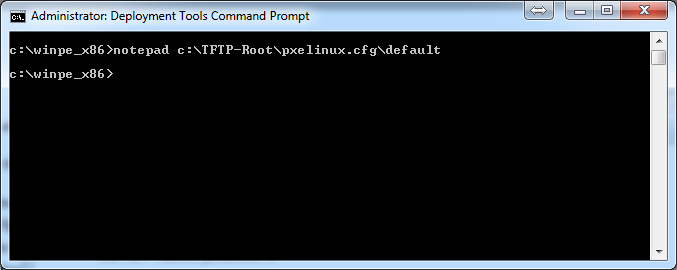
Open C:\tftp-root\pxelinux.cfg\default
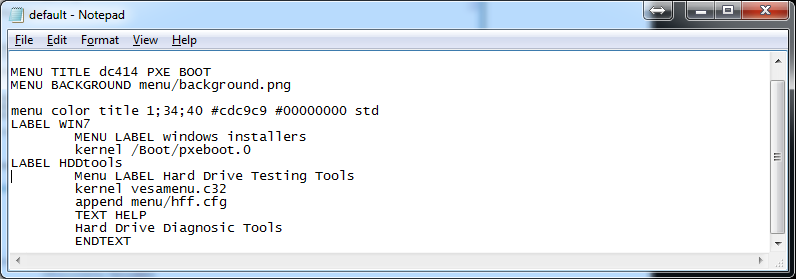
now lets add an entry for this hdd diag tool.
LABEL HDDtools

Menu LABEL Hard Drive Testing Tools

kernel vesamenu.c32

append menu/hdd.cfg

TEXT HELP

Hard Drive Diagnostic Tools

ENDTEXT
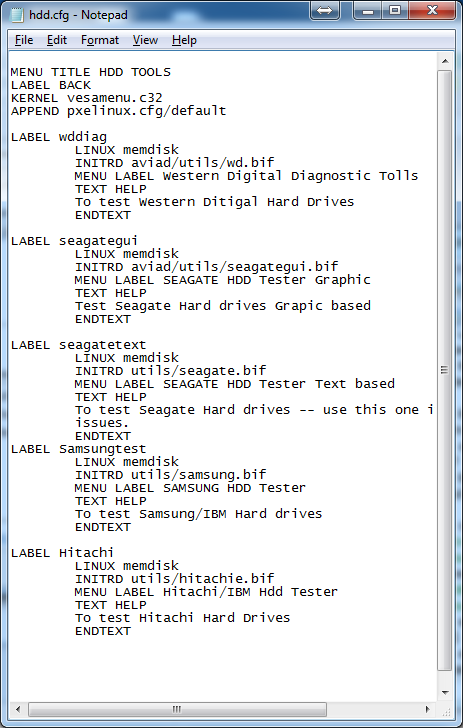
Now we need to make a file called hdd.cfg in side the menu folder and make it boot our images. Place all these files inside the util folder for img and other image files and place iso in side of the iso folder. Link to them accordingly.
Contents of hdd.cfg
if we want to boot an iso we want to do a
LABEL AcronisDiskDirector

LINUX memdisk

APPEND iso

INITRD iso/Adds.iso
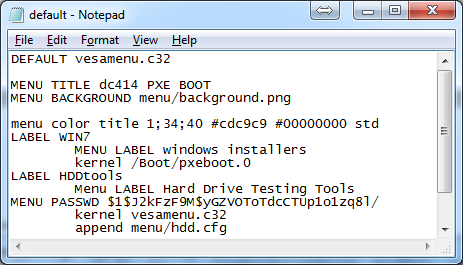
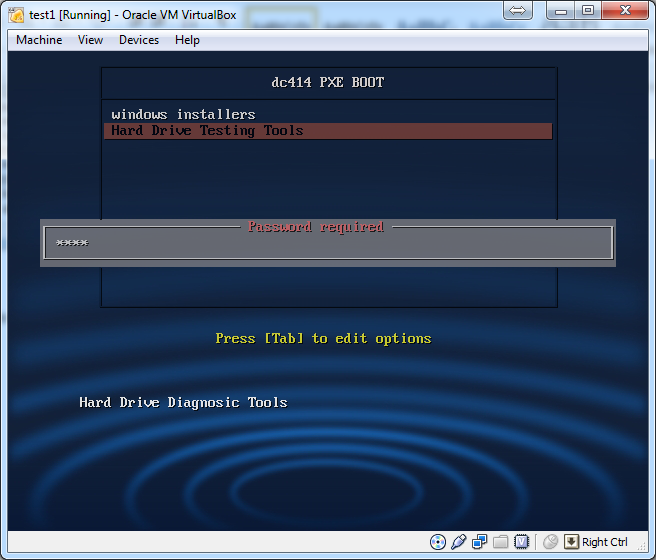
We can also boot basically anything we want just need to create a menu system. That will take us there. We can also add a password to the menu system if we don’t want someone to get access to certain things.
MENU PASSWD passwd

(Only valid after a LABEL statement, or a MENU BEGIN statement.)

Sets a password on this menu entry. "passwd" can be either a cleartext password, a SHA-1 encrypted password (starting with $4$), or and MD5 encrypted password (starting with $1$).

You can protect an entire submenu by using "MENU PASSWD" after the submenu's "MENU BEGIN."

Use the included Perl scripts "sha1pass" or "md5pass" to encrypt passwords. MD5 passwords are compatible with most Unix password file utilities; SHA-1 passwords are probably unique to SYSLINUX. Obviously, if you don't encrypt your passwords they will not be very secure at all.

If you are using passwords, you want to make sure you also use the settings "NOESCAPE 1", "PROMPT 0", and either set "ALLOWOPTIONS 0" or use a master password (see below.)

If passwd is an empty string, this menu entry can only be unlocked with the master password.
MENU MASTER PASSWD passwd
Sets a master password. This password can be used to boot any menu entry, and is required for the [Tab] and [Esc] keys to work.
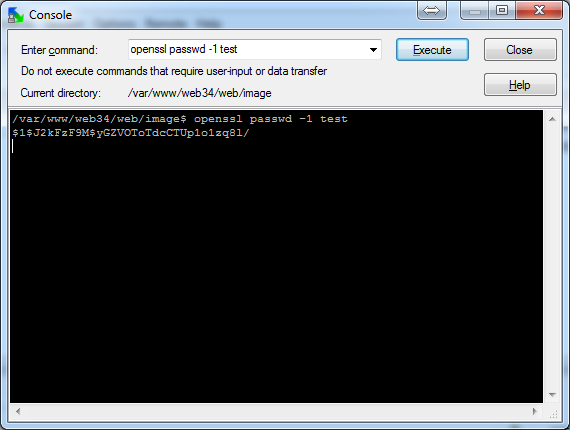
To generate a password use openssl passwd -1 mypassword
Example:
In my case its test
Trouble shooting:
If you get an unmountable boot volume its cause there is no ramdisk options in your bcd config please reread the instructions on how to setup bcd.
Network card is not detected in pxe env. Go to manufactures website and download there network card driver, and run the add driver commands.
If you get a ip fragment please open up your registery and goto [HKEY_LOCAL_MACHINE\SYSTEM\CurrentControlSet\services\Tcpip\Parameters\Interfaces\guid for my network card
and setting MTU to 1492 and rebooting the system once you do that error should resolve its self.
If you get a gray screen on the syslinux menu its problem because the name was spelled wrong. Check the tftp log and correct spelling if it is the case.

Excellent guide! To save space on your server, you can also delete/rename the file “ei.cfg” in your windows installer folder, and the windows installer will ask you which version you want to install.
This trick also works when burning installation discs. Just remove ei.cfg from the ISO and you’re good to go. It helps to have universal install media on the jobsite!
also should note in these cases, the wim files have one entry on them. to cut down on the file locking issues on linux 🙂 aka have more then once user unsing an installer at a time.
+1, thanks!
hi could i add a path from my nas to take iso from there?if yes how?